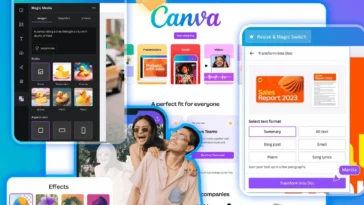
Creating digital products is a fantastic way to showcase your creativity and earn revenue online. But if you’re a beginner, tools like Photoshop or Illustrator might feel overwhelming. That’s where Canva comes in—it’s intuitive, user-friendly, and packed with templates that make design effortless. In this guide, we’ll walk you through creating professional-quality digital products from scratch, even if you’ve never designed anything before.
Step 1: Understanding Canva’s Interface
Before diving into your first project, it’s important to get comfortable with Canva’s dashboard:
- Templates Library: Thousands of ready-made templates for ebooks, social media posts, planners, and more.
- Elements: Icons, shapes, stickers, and illustrations you can drag and drop.
- Text Tool: Easily add and customize fonts, sizes, and colors.
- Uploads: Import your own images or logos to personalize your design.
Pro Tip: Spend 10–15 minutes exploring the interface to get familiar with all the available tools.
Step 2: Choosing the Right Template
The foundation of a great digital product is a visually appealing layout. Canva’s templates give you a head start:
- For ebooks → Look for multi-page templates with clean layouts.
- For social media graphics → Pick sizes optimized for Instagram, Facebook, or Pinterest.
- For planners & printable templates → Choose functional layouts with grids and sections.
Example: A planner template with sections for daily tasks, notes, and goals can be easily customized with your brand colors.
Step 3: Customizing Your Design
Now comes the fun part—making the template your own:
- Colors & Fonts: Stick to a consistent color palette and font style to maintain a professional look.
- Images & Icons: Replace placeholder images with high-quality stock images or your own photos.
- Branding: Add your logo, brand colors, and consistent elements across your products.
- Interactive Elements (Optional): Add clickable links in PDFs or use Canva animations for digital downloads.
Pro Tip: Less is more. Avoid overcrowding your design; simplicity often appeals more to buyers.
Step 4: Exporting Your Product
After designing, export your project in the correct format:
- PDF: Perfect for ebooks, planners, and printable templates.
- PNG / JPEG: Ideal for social media graphics or downloadable images.
- Interactive PDFs: Keep clickable links intact for ebooks or guides.
Pro Tip: Always preview your file before uploading to your store to ensure everything looks perfect.
Step 5: Uploading & Selling
Once your digital product is ready:
- Upload it to landom.store under the correct category.
- Add a catchy title, clear description, and appealing featured image.
- Consider offering bundle deals or including multiple templates to increase value.
Bonus Tips for Beginners
- Start with simple templates before moving to complex designs.
- Experiment with color schemes that match trending design aesthetics.
- Keep customer usability in mind; products should be easy to edit and use.
- Stay updated with Canva’s new features, like AI-powered tools and animation options.
CTA (soft):
Ready to start creating? Check out our exclusive Canva templates collection at landom.store and start designing stunning digital products today!


 No products in the cart.